The roasted rice adds a nutty flavor and aroma that combines perfectly with green tea.
This tea is popular in Japan, where it has a long tradition.
Whenever I drink genmaicha, it brings back good memories of my life as a student in Japan.
I’ve always wondered if it was possible to roast my own rice so that I could blend it with green tea and make my own genmaicha. In this article I’ll share with you how to best go about making genmaicha at home.
Prior research
I first searched online for a recipe, but most of the information available was pretty lame.
The first mistake I noticed was that some people used brown rice. Genmai (玄米) does mean brown rice in Japanese, but in genmaicha the rice used is white roasted rice.
Sometimes people also refer to it as toasted rice. For the rest of this article I’ll just call it genmai as the Japanese do.
There are two types of rice that can be used: mochi rice and Japanese rice (uruchimai). Mochi rice yields a better genmai but since it’s expensive and harder to get, I’ll use Japanese rice. You can order it from amazon here (affiliate link) if it’s not available near you.
I also want to make genmai with methods available in the kitchen. When I looked at sites about how puffed rice was made (because it looks similar to genmai), I found that the process involves great pressure.
Other more traditional recipes called for the use of hot sand, or frying in oil. High pressure and hot sand don’t look safe to me so I discarded those. Frying in oil would ruin the taste of genmaicha, in my opinion, so I’ll refrain from doing that too.
I found brief descriptions in a couple of Japanese genmaicha companies saying that the process for genmai production involved soaking, steaming, drying and roasting. No temperatures, times or any other workable measurements are given.
Another discovery was a very thorough article by Dave Arnold about puffed snacks from the Cooking Issues blog: “Making puffs is as simple as: over-cook, dehydrate, and fry.”
Dave also states that the moisture content should be about 12%. The problem with that article is that he used a dehydrator, and he fries the snacks at the end. However, he says one can use also use an oven for drying and a microwave for puffing.
The experiment
I followed different recipes in order to test them:
- Only roasting the rice in a pan
- Soaking the rice before roasting
- Soaking, cooking and roasting
- Soaking, over-cooking, drying and roasting
- Soaking, over-cooking, drying and microwaving
1. Roasting the rice in a pan
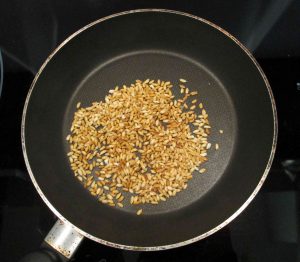 I saw various articles with this simple recipe. Whoever tells you that this is the method to make genmai probably never drank genmaicha before!
The result doesn’t look like genmai at all and the rice is very hard, no puffing at all.
Don’t even bother trying this method.
2. Soaking the rice before roasting
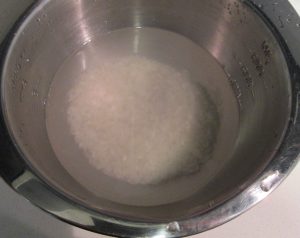 In this attempt, I soaked the rice for 2 hours. Notice how the rice grains become clear.
This way they have some moisture to help them puff.
Next, I roasted the soaked rice. If I used high heat (and this goes for all the recipes), the rice had the tendency to quickly burn.
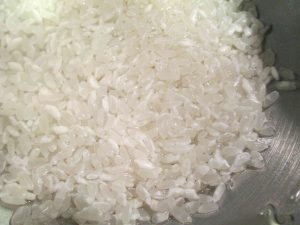 So I used medium heat for some time until it looked about right. This takes less than 5 minutes.
Be careful because once the rice starts to turn brown it will burn easily. It happened to me 3 times!
Burned genmai will taste awful, so don’t over-roast.
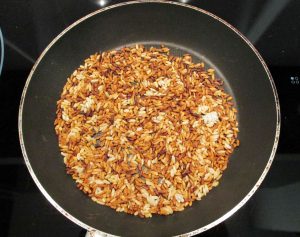 The texture looked better than in recipe 1 but it was still too hard.
Real genmaicha should be crunchy so that you can easily chew it.
I actually like to eat some of it after drinking the tea.
3. Soaking, cooking and roasting
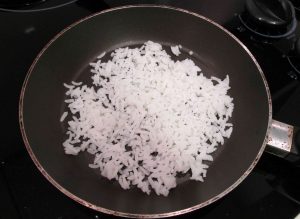 This recipe involves steaming. After soaking the rice as in recipe #2 I also rinsed it until the water was clear, just like when cooking normal rice.
I decided to use a rice cooker and cook the rice using the standard measurement of water per cup of rice as indicated by my rice cooker.
Once it was done cooking, I didn’t open it for 15 minutes so that it steamed some more. Then I would let the rice cool, because while it’s still hot it releases too much moisture.
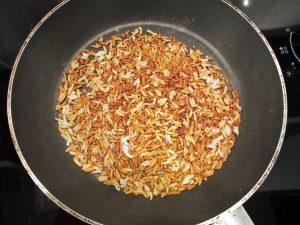 Finally, I roasted it at medium heat. The result was softer than recipe #2 but it still doesn’t look as puffy as real genmai.
Flavorwise I guess it kind of passes, though. I suppose you could actually use this recipe if you aren’t too picky 🙂
4. Soaking, over-cooking, drying and roasting/microwaving
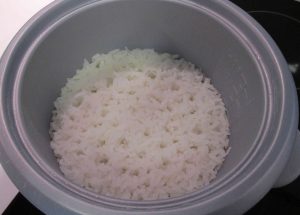 According to Dave, to ensure that the moisture content is right, one has to over-cook first.
I did that by adding twice as much water to the rice cooker. The rice comes out super soft and sticky.
I allowed it to cool before placing it in a silicone baking sheet. Then I placed it in the oven at 135 °F (57 °C) for two hours, with the oven door a bit open.
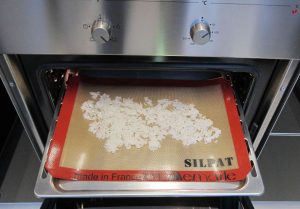 The idea here is just to dry it, not cook or burn it.
After the 2 hours, turn off the oven and leave it to cool overnight. The next day I found that the rice had indeed dried, but not evenly 🙁 Perhaps because some rice grains were on top of each other?
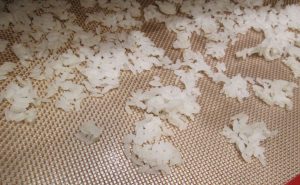 The rice grains that looked good had a plastic, rubbery texture (unlike normal cooked rice which is soft) and the outside was a bit hard.
I guess that they had the right moisture content, it’s hard to tell.
Many rice grains had stuck to each other. This was annoying because I had to manually separate them to continue the process!
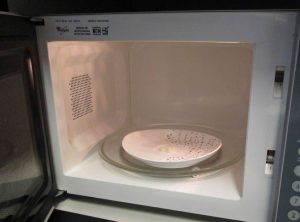 I then tried using the microwave, in order to speed things up. 2 minutes for a small amount of rice. If I had used more rice probably the time would be longer.
Since the rice wasn’t evenly dry, not all of them puffed.
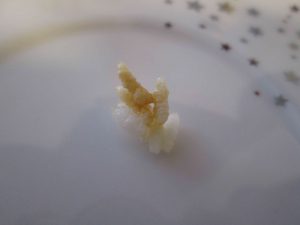 The ones that did had a good texture (small bumps similar to commercial genmai), the crunchiness was good but the color was a bit whitish.
I liked this batch in terms of flavor, it was a good quality overall.
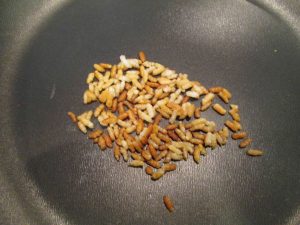 But the batch that I roasted in a pan was the best of them all, although I still had the problem of the unevenly-dried rice.
It’s not exactly like the genmai found in genmaicha but it’s pretty close.
Mine looked longer and had a slightly different color but the crunchiness and taste were not so far off.
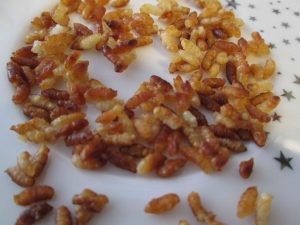 By the way, in none of the methods above did the rice fully pop into what looks like popcorn. To me that was okay because I prefer just the genmai.
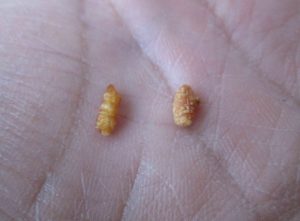
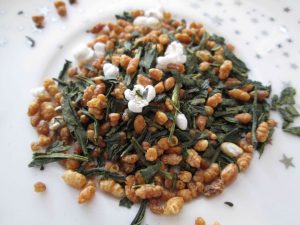
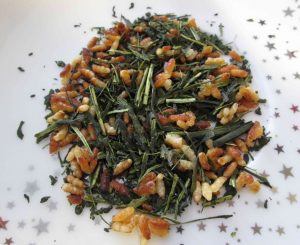 Finally I mixed my homemade genmai with loose sencha leaves and my genmaicha was completed!
I guess I can’t really compare it in a fair way because I used tea leaves from a high-quality sencha. I tried it and it was great!
I also made enough to give away as gifts 😉 The added value of having roasted your own genmai is definitely worth it, although the process probably needs some more adjustments.
I encourage you to try making your own roasted rice. Please write about it in the comments to share your experience.




August 15, 2012
The ultimate home made tea project! I just acquired some Sencha Maroyaka that won at the 2012 North American Tea Championship and I have some rice that I recently brought back from Tokyo so I’m off to my kitchen to give your recipe a go. I may fiddle around with adding some Matcha as well. I agree that using deep fried rice in Genmaicha would be a bad idea. Wouldn’t that leave the tea with an oil slick on top and an undesirable mouth feel? Your method sounds right to me.
August 15, 2012
Thanks for the comment, Jennifer. Best of luck with your cooking. I advise you to roast in small batches, because that is the most delicate part and it takes some tries before you get the hang of it. Also use the pan instead of the microwave, because it’s easier to keep an eye on.
September 7, 2012
Gotta love a good tea experiment. This is something I’ve always wondered about, so thanks for covering this topic. I’ll have to try this soon. You seem to be big on Japanese tea so I don’t know if you drink much Chinese tea, but I’ve been working on an experiment in making my own shu pu’er, so we’ll see how that turns out.
September 8, 2012
Hello Kyle.
Thank you for your comment. I don’t drink much Chinese tea but when I do it’s usually oolong or pu-erh. Good luck with your experiment, remember that it usually takes some failures before you get it right.
January 19, 2013
Hey there, I think you are pretty much the only person online who suggested using white rice. I did not have mochi rice or Japanese rice so I ended up using jasmine rice. I washed it first then I toasted it in a pan. the tea came out pretty well and similar to that of my favorite tea at my local Japanese restaurant. I think I ought to try using mochi rice next time though. Thanks!
January 20, 2013
Hello Nadda, thanks for the comment. I used white rice because that’s what I read in Japanese websites, apparently the brown rice doesn’t turn out as well because of its hard outer shell.
I’m glad the jasmine rice worked out for you : )
February 15, 2013
This is really interesting Ricardo! Thanks for experimenting – you’ve done the work and now we can use your best result! I wonder if the popped rice grains are done from raw grains similar to popcorn. I’m going to try popping them in my dry popper and see what happens.
February 15, 2013
I’m glad you liked the article, Linda.
You can pop raw rice grains by using enough pressure, but that requires machinery not available for kitchens.
The reason popcorn pops easily is because it has enough moisture inside. Since rice grains don’t, we have to cook them first.
April 7, 2013
Ricardo, What is the proportion of rice to green tea to give the right taste? Equal parts by weight or volume?
April 7, 2013
Hi Gken.
The usual proportion is equal parts by volume, but it’s really up to you. Don’t add too much rice though, or it won’t taste like tea : )
June 22, 2013
Did you try dry roasting the rice first, then over cooking with double the water then drying? If you dry roast first, the kernals will not be very sticky when you go to roast it in the oven even if it is over cooked. I make my rice this way all the time and it is always fluffy regardless of the kind of rice I use. When I dry roast the rice, the kernals pop a little and with moisture they should expand more fully for oven roasting. You may not even have to double the water if you use this method. I think the higher heat cause the kernals to pop just like popping corn.
June 22, 2013
I haven’t tried that, but thanks for the tip!
If it gives a better result I’ll update the info.
October 2, 2013
I always thought the popped pieces in genmaicha were popped rice pieces, but it’s actually popped sorghum seed.
October 2, 2013
Traditionally, it is popped rice. However, now you can have popped sorghum and millet, perhaps because they have a lower price?
I looked at Japanese genmaicha ingredients and in some cases it is as you say, thanks for pointing that up. For example, look at this page:
http://www1.ocn.ne.jp/~mainichi/1-2genmaicha-moto.htm
It’s in Japanese, but is says prices for different types of genmai. The “hana”, which is the popped component, is twice as expensive when made with mochi rice, instead of millet.
October 20, 2013
maybe you can drying cocked rice on refrigerator.
i’thing is the best way to drying food without heat material.
i live in rice country, when i have rice leftover, i store in refrigerator, if i forget to eat in couple day its dry like crunchy snack and no sticky.
maybe you can try it.
November 18, 2013
I just returned from a week-long trip to Japan, where we met with several tea growers and blenders/finishers (seicha). During one of our meetings, for what it’s worth, they noted that American rice is sometimes (often?) used because it is cheaper than Japanese rice. Unfortunately, I did not think to inquire more deeply about how the rice is made……
November 19, 2013
Hi Chuck
Thank you for your comment.
What an interesting trip, I’m jealous : )
I didn’t know that sometimes American rice is used, but it doesn’t surprise me. As you pointed out, Japanese rice is expensive, even for the average Japanese consumer!
May 6, 2014
When you did the roasting-only method, did you wash it first (at leat 3 times) so the rice was a little damp? Because this is what I do, and it comes out fabulously. It pops into popcorn and everything!
May 6, 2014
Hello Tyler
As you can see on experiment #2, I soaked it for 2 hours. However, it was still too hard compared to commercial genmai, and tended to burn easily instead of popping.
November 26, 2014
Would a pressure cooker add something to the process?
November 26, 2014
Hi Craig
You’d be able to cook the rice faster. That’s about it.
March 10, 2015
What about using mochi rice cakes? It is popped rice…
March 10, 2015
I guess you could, but if I’m not mistaken some rice cakes contain sugar, which can alter the tea’s taste.
July 4, 2015
Though using mochi-gome (sweet glutinous rice) might cost more, it might be worth it to try the experiment with this kind of rice.
You mentioned that your results weren’t as puffy or blistery as the commercial varieties. If you’ve ever seen mochi (rice cakes) being toasted, they puff up like a balloon, and the outside becomes really crackly–you might, then, achieve the same result with the grain intact.
Your quest for the perfect genmai may be achievable, after all!!
July 4, 2015
Hi Mo
Yes, I have to try the mochi-gome. Actually some of the better quality genmaicha are made using that type of rice. I believe it even tastes better when the tea is brewed.
November 14, 2015
What a worderful tutorial i’ve known. But…What is the moisture after you roasted brown rice? The “12%” is the moisture’s product? About green tea, I know that the moisture’s product, i mean after dried is 3 – 5%. And, i want to try the first recipe but i dont know about the temprature you use in how many minutes?! It’s very kind of you to write this article, and sorry about my English!
November 15, 2015
Yes, 12% should be the moisture after drying the rice, but before roasting it. After roasting it, the genmai will have a low moisture content.
Recipe number 1 doesn’t give good results, so I don’t recommend it. But if you want to do it anyway, roast at medium heat until the rice turns brown.
November 17, 2015
oh i see. But have you ever used brown rice to make genmaicha?
November 17, 2015
I haven’t used brown rice, but I guess it can work too.
November 29, 2015
I roasted raw organic short grain brown rice in the same way as I roast seeds and nuts: in a well-seasoned old fashioned heavy cast iron frying pan. With the gas on full, I kept shaking the grains in the pan as it heated up. Once the pan had heated up and the rice began to crackle, I lifted the pan so it was an inch or two above the flames and continued to shake it, keeping the grains on the move. When it seemed to have cooled a bit too much, I put it back on the flame briefly and used a slice to turn the grains and keep them moving, then lifted it back off the flame and kept shaking. Some of the grains popped open, and I carried on until they darkened a bit and began to smell good. A heaped teaspoonful of toasted grains and a 3-finger pinch of green tea leaves brewed in a mug tasted good to me – pretty similar to the roasted brown rice tea I had in a Japanese restaurant yesterday. And it took less than 10 minutes to do. It’s difficult to roast seed and nuts in thinner frying pans because they heat up too quickly, burning the nuts/seeds on one side before there’s time to turn them, I suspect the same goes for rice.
February 17, 2016
Hello, I read your article and the comments and gave it a shot and thought I would share my results. I tried roasting the rice 3 times. Because I was put off by the laborious, soak, cook, separate and then roast recipe that seemed to work best for you, I decided to try the recipes used by others.
I used basmati rice in all of my experiments.
1. I tried El’s method of roasting dry rice in a heavy cast iron skillet on super hot. The rice roasted up quite well and smelled very fragrant. But when I mixed it with my sencha and made a cup the sencha pretty much drowned out the nutty rice taste even though the proportions looked correct. I think this method yields a weaker taste. Also of note, I was worried about burning the rice so may have taken it off before flavor peaked even though it as brown and fragrant. I received no popping and the rice didn’t look like the standard genmaicha rice with it’s stippled surface.
2. I rinsed the rice 3 times in water and then roasted in a heavy pan. I got a few pops and plenty of fragrance but I got impatient with the heat on medium high and blasted the heat. This gave off a lot of fragrance, but it smelled a wee bit burnt. And some of the kernels were super dark while others were a medium brown. This time I mixed a bath of tea half sencha/half rice. tasted strong and smoky and I couldn’t decide if I liked it or not.
3. Soaked the rice for 36 hours, rinsed 3 times and then pan roasted. This time I finally got the appearance of genmaicha with the stippled rice surface. I kept the pan on high because of my low patience but was careful not to brown too much, stirring and shaking the pan constantly and turning off the heat right before it seemed finished. Then I stirred and shook some more to keep the kernels going in the residual heat. These came out looking and smelling the best. Nice brown color, nice stippling, no pops though.
I’ve been adding #2 and/or #3 to batch 1 to make pots of tea. I find the more burnt batch #2 good for evenings when I’m feeling cozy and couch-bound and the round 3 for mornings for a lighter roasted aroma.
I think the best method was definitely round 3 soaking the rice for at least 36 hours, {I’m sure 48 would have been good too} then rinsing 3 times and then pan roasting. Had all the marks of genmaicha minus the popping and flavor can be adjusted depending how long you roast and on what type of flame.
I’ve been keeping the roasted rice and batches separate and modifying how much I add to a pot of sencha depending on my mood. Works well!
Hope this helps anyone who wants to try. Wish I could upload my comparative pics!
February 17, 2016
Hi Anna
Thank you for your very detailed comment!
It seems that soaking is key. I haven’t tried the recipe with any other type of rice, though.
I advise to mix no more than 50% rice by volume with your green tea, otherwise the flavor of the roasted rice overpowers that of the tea.
February 18, 2016
Hi, I just ordered some Genmai Tea on Ebay. I don’t have loose leaf tea, i just have the tea bags. What would be adequate time to steep and the right temperature to use for it.
Thank you
February 18, 2016
Hi Alex
30 seconds of boiling water is the standard for genmaicha, provided that you use small cups (4 oz).
If the cups are bigger, you can increase the time for 2-3 minutes. However, don’t expect to be able to make additional infusions.
March 9, 2016
What a great article! I bought the same rice you did. I will try the 36-hour soaking method. Thank you all for posting your results!!
Can’t wait to try!
March 10, 2016
Hi Johanne
Have fin with the recipe. Please tell us about your results.
March 11, 2016
I will! I’ll try the first batch tonight. I was wondering… have you tried half-cooking the rice??
March 11, 2016
No, I have always cooked the rice fully.
March 13, 2016
So I soaked my rice for 3.5 days. Mostly because I didn’t have time to do anything with it until this morning.
Then I dry-roasted it in a pan; took about 15 minutes.
I am thrilled with the result.
Next time, I will try to book the rice for just a few minutes before roasting it. Just to see what the results are.
March 13, 2016
Good to know that you had good results. Enjoy your homemade genmaicha!
July 9, 2016
Fabulously methodical and detailed article. Thanks for posting this.
When you suggest no more than 50% rice to tea, are you talking about weight? If not, could you make a weight-based rule of thumb? (I find volume terribly inexact for comparing very different kinds of ingredients.)
Thank you!
July 9, 2016
Thanks for commenting.
Yes, 50% by volume.
It’s more about taste than about exact measurements. The idea is that if there’s too much rice, the flavor of the tea will be too light.
Also take note of the following: if the bancha leaves also have twigs, they add to the weight, but provide no flavor. The strength of the flavor of the green tea also determines how much rice to add.
April 2, 2020
Hi in India, we do get already puffed up rice (we call it murmura or parmal). Can I use it and roast it before blending with tea leaves? Thanks
April 2, 2020
Hi Manish
I haven’t tried the Indian puffed rice. I guess it can work. Try it and see if you like it.
February 26, 2021
This seems like a dumb question, but how do you rinse rice 3x? (As per Anna’s Feb 2016 comment) Do you rinse and pause for a specified amount of time, then rinse again, etc? Just seems like otherwise it’s just one long rinse, like you suggested (until they are clear…)
February 7, 2022
Hi Loralee
Sorry for the very late reply. For some reason the system didn’t notify me.
It’s not one long rinse, because the idea is to throw away the cloudy water each time. Also, you can buy musenmai (no wash rice), which doesn’t need to be washed.
February 6, 2022
I see comment span many years and wonder if anyone has considered using an airfryer for roasting?
February 7, 2022
Hi Claudia
Thank you for the insight. I have never tried using an air fryer.
The reason was that at the time of this post, air fryers weren’t yet very popular.
But I’ll try it as soon as I can and tell you about it.
February 9, 2022
It turns out that it can’t be done with my model of air fryer. Your air fryer needs to be able to work for more than an hour, and at 123 F of lower.
You can search online: “how to dehydrate with an air fryer”.
May 23, 2022
Wow, a quick search gave me a mix of the same results you had before you made this article as well as what look like copies of your method. I haven’t looked hard yet, but it seems like one of those things that should be much more simple than we think. If I recall correctly, genmai cha was a result of people trying to make their tea supplies last longer to save money. So how would people be preparing the rice at home that would result in this tea? For something they regularly cooked, or perhaps sweets? Or did they try something that almost worked, and then later adapt it to its own method? (Of course I can look this all up on my own, and probably will after posting this :P)
When you’re stir frying rice, the best rice to use is from the day before, because it has dried out. I have kept rice sealed at room temperature for a day before using the leftovers for stir frying, back when I was on a “refrigeration is a new thing and it’s not always necessary” phase. That is one particular that might come in handy. Another thing on my mind is Chinese dishes made from intentionally letting rice burn to the bottom of a pot. I was really surprised when I found out that was a thing people made use of, and didn’t just discard as a failure hehe.
May 23, 2022
Hi Kim
Maybe it was a simpler method back in the days, but in later times there were improvements in the process. For example, some dishes work better if you have specialized equipment, like pizza made in a traditional oven.
You are right that leftover rice is better because it is drier than fresh made rice that is still releasing steam. Actually, I haven’t bought it yet but I’m thinking of using a dehydrator.
January 16, 2023
Thank you for sharing each of your trials, plus everyone’s comments filled with added suggestions.
Here was my lazy attempt based on everyone’s suggestions…and it worked well.
After reading through the post, I was itching to try this out.
With a carton of old white rice from take-out Chinese food that had been in my fridge for a few days, I put about a 1/4 cup in a cold cast iron pan and set it on HIGH. Since it’s too heavy for me to shake continuously, I stirred it with a wooden spoon (never stopping). Within several minutes the rice started popping and by 10 minutes it was all toasty and brown. I removed it from the heat right before it was done and just kept stirring.
The results were puffed and textured toasted rice.
I just added it to some loose leaf green tea and it was “passable”. Might need to add more rice into my mixture for a more flavor.
Shocked how the laziness actually paid off on this first attempt.
Hope that helps.
January 16, 2023
Hi Aniela
Thank you for your comment. I hadn’t thought about using leftover rice.
November 26, 2023
Has anybody tried maybe airfrying or oven roasting minute rice. Gonna try it out
February 28, 2024
Gosh there are so many articles with so many different ways for preparing rice for genmaicha. In my own experiments, i browned the rice in a pan first, which did impart some nutty flavor but it was just hard little kernals of rice. The 2nd experiment i messed up but had better flavor for the oops, and that was i put that browned rice in the water before bringing the water to a boil, i ended up cooking the pre-toasted rice which and then when the water began boiling i tossed in my green tea, a dash of matcha powder and it was quite passable. I’ve also purchased Hojicha to impart the nutty flavor into my green teas and kind of bypass the rice part but i’m still trying to figure it out. The cooking first method didn’t work for me in my attempt, the rice was just tooc lumped together, i couldn’t get it break up well enough, it stayed sticky for too long. I just ended up throwing away that batch 🙁 I’ll figure this out eventually.